


技术分享
KVM虚拟机操作手册(部分)
2019-03-06
NOTE: ‘#’开头的是root权限执行的命令
‘virsh #’开头的是virsh命令行下执行的命令
1 环境说明
1.1 硬件环境
| 硬件 | 硬件类型 |
|---|---|
| CPU | Intel(R) Xeon(R) CPU E5-2630 v3 @ 2.40GHz*32 |
| 内存 | 32G |
| 硬盘 | 2T |
1.2 软件环境
| 项目 | 版本 |
|---|---|
| 操作系统 | CentOS Linux release 7.3.1611 (Core) |
| hypervisor | QEMU 2.0.0 |
| CPU虚拟指令集 | vxm |
| 网络模式 | NAT |
| 服务器IP | 192.168.131.2 |
| SELINUX | 关闭 |
| Firewalld | 关闭 |
2 KVM安装
2.1 检查机器是否支持kvm虚拟化
# grep -E '(vmx|svm)' /proc/cpuinfo |wc -l
vmx为Intel的CPU指令集
svm为AMD的CPU指令集
如果输出不为0或者空则表示支持虚拟化,如果为0的话需要在服务器BIOS主板设置里打开VT。
2.2 安装kvm
# yum install -y qemu-kvm libvirt libvirt-python libguestfs-tools \virt-install
2.3 启动libvirt服务
# systemctl enable libvirtd && systemctl start libvirtd
2.4 检查kvm模块有没有加载
# lsmod |grep kvmkvm_intel 162153 43kvm 525259 1 kvm_intel
如果没被加载执行以下命令进行加载
# modprobe kvm-intel
3 创建虚拟机
3.1 创建需准备以下资源
| 项目 | 来源 |
|---|---|
| 虚拟机磁盘镜像 | 通过qemu-img命令创建 |
| 虚拟机启动镜像 | 从OS发行版官网下载 |
3.1.1 磁盘准备
文件目录使用规范(按个人喜好)
| 文件夹 | 路径 |
|---|---|
| 磁盘镜像目录 | /var/lib/libvirt/images |
| 启动镜像目录 | /mnt/images |
磁盘创建
# qemu-img create -f qcow2 test.qcow2 50GFormatting 'kolla.qcow2', fmt=qcow2 size=53687091200 encryption=off cluster_size=65536 lazy_refcounts=off
参数说明
qemu-img  qemu磁盘管理工具
-f qcow2 磁盘格式为qcow2test.qcow2 磁盘名
50G 磁盘大小
查看已创建的磁盘
# qemu-img info test.qcow2image: test.qcow2
file format: qcow2
virtual size: 50G (53687091200 bytes)
disk size: 196K
cluster_size: 65536Format specific information:
    compat: 1.1
    lazy refcounts: false
3.1.2 镜像准备
直接可以从官网下载,例如centos7,选择163源进行下载
linux系统可以使用命令进行下载:
wget http://mirrors.163.com/centos/7/isos/x86_64/CentOS-7-x86_64-DVD-1611.iso
3.2 创建虚拟机
# virt-install \--name test \
--vcpu 4 \
--ram 4096 \
--disk path=/var/lib/libvirt/images/test.qcow2 \
--cdrom=/mnt/images/CentOS-7-x86_64-DVD-1611.iso  \
--graphic vnc,listen=0.0.0.0
–name test
虚拟机的名字–vcpu 4
虚拟机cpu的核数–ram 4096
虚拟机的内存,单位是MB–disk path=/var/lib/libvirt/images/test.qcow2
磁盘镜像,path路径后面是已经创建好的磁盘镜像。如果之前没有创建镜像的话可以用这条命令直接创建,后面需要加上’,size=50G’size是大小。–cdrom=/mnt/images/CentOS-7-x86_64-DVD-1611.iso
系统镜像,可以从官网直接下载,也可以用–localtion参数在线加载。–graphic vnc,listen=0.0.0.0
启动vnc来连接实例,如果有装了图形界面就可以直接用console命令链接。
3.3 查看虚拟机情况
为方便操作进入virsh命令行进行操作。
- 查看虚拟机状态
virsh # list --all
查看虚拟机vnc端口
bash
virsh # vncdisplay test
:5
VNC端口为5,可以从任意ping的通物理服务器的机器安装VNC客户端进行连接为5905用物理服务器IP:VNC端口 例如:192.168.131.2:5905
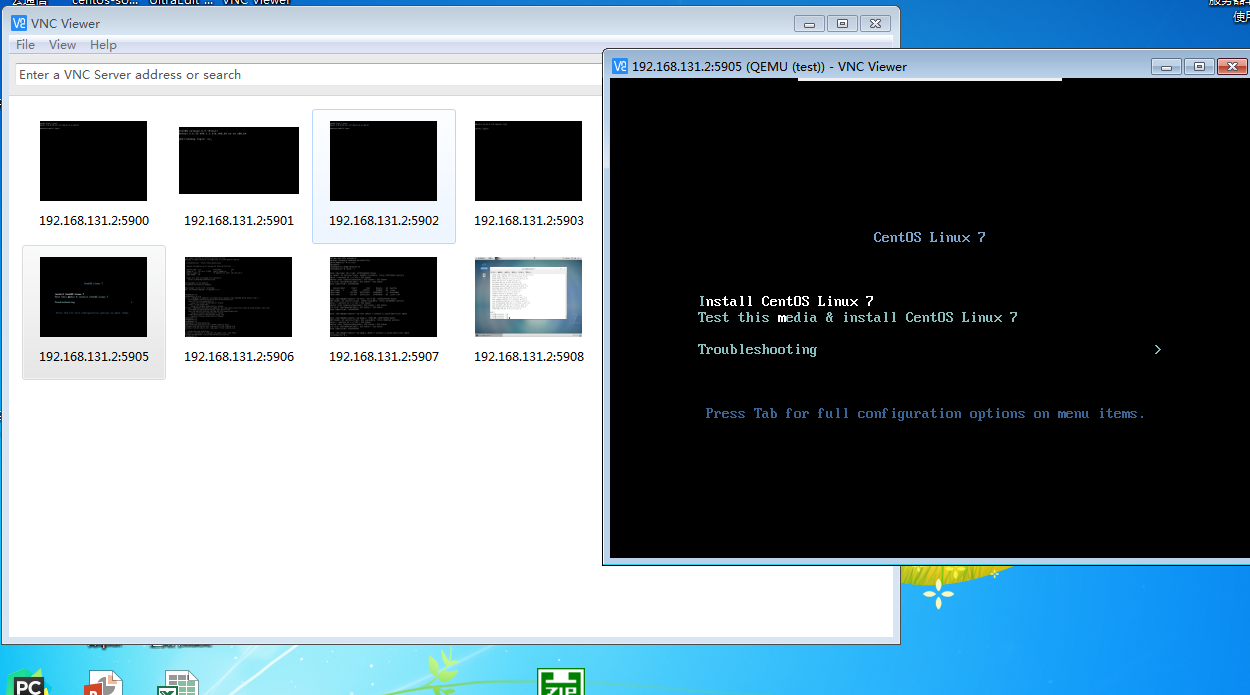
安装完成就可以使用啦。4 虚拟机克隆
像上面那样装系统,每次都要重新设置引导磁盘分区什么的,非常麻烦。我们可以把我们已经装好的虚拟机进行克隆,就省去了很多麻烦。
4.1 先对需要克隆的虚拟机进行挂起操作
virsh # suspend testDomain test suspended
4.2 进行克隆
# virt-clone \--original test \
--name test-clone \
--file /var/lib/libvirt/images/test-clone.qcow2
WARNING  Setting the graphics device port to autoport, in order to avoid conflicting.
Allocating 'test-clone.qcow2'                                                                                   |  75 GB  00:00:04     Clone 'test-clone' created successfully.
–original test
要克隆的原始虚拟机–name test-clone
新克隆的虚拟机名字–file /var/lib/libvirt/images/test-clone.qcow2
克隆机的磁盘,如果这个路径没有test-clone.qcow2会新建一个
4.3 恢复虚拟机
virsh # resume testDomain test resumed
4.4 开启克隆的虚拟机
virsh # start test-cloneDomain test-clone started
5 虚拟机快照
快照可以保存某一个时间点虚拟机的状态,如果有需要可以通过快照来把虚拟机恢复到那个时间点的状态。
5.1 镜像格式转换
virsh # snapshot-create ubuntuerror: unsupported configuration: internal snapshot for disk vda unsupported for storage type raw
KVM只支持qcow2格式的镜像创建快照,非qcow2的需要转qcow2格式的才能进行快照操作。找到虚拟机对应的磁盘镜像用命令开始转换,如果创建的时候用的就是qcow2格式的磁盘则可以直接创建快照。
# qemu-img info ubuntu.imgimage: ubuntu.img
file format: raw
virtual size: 7.0G (7516192768 bytes)
disk size: 1.9G
进行转换
# qemu-img convert -f raw -O qcow2 ubuntu.img ubuntu.qcow2
检查是否转换成功
# qemu-img info ubuntu.qcow2image: ubuntu.qcow2
file format: qcow2
virtual size: 7.0G (7516192768 bytes)
disk size: 2.0G
cluster_size: 65536Format specific information:
    compat: 1.1
    lazy refcounts: false
这里的转换并不是把原镜像文件转换,而是复制出去一份进行格式转换。
5.2 修改配置文件
修改磁盘信息,*修改配置文件之后必须重启重新加载配置文件
快照创建动作可以在开机状态进行,快照恢复必须在关机状态进行。*
virsh # edit ubuntu
  <devices>
    <emulator>/usr/libexec/qemu-kvm</emulator>
    <disk type='file' device='disk'>
      <driver name='qemu' type='qcow2'/>
      <source file='/var/lib/libvirt/images/ubuntu.qcow2'/>
      <target dev='vda' bus='virtio'/>
      <address type='pci' domain='0x0000' bus='0x00' slot='0x04' function='0x0'/>
    </disk>
5.3 通过开关机对虚拟机配置进行重载
virsh # shutdown ubuntuDomain ubuntu is being shutdown
virsh # start ubuntuDomain ubuntu is being start
5.4 创建快照
virsh # snapshot-create ubuntuDomain snapshot 1495769524 created
也可以通过snapshot-create-as命令创建有自定义名字的快照
virsh # snapshot-create-as ubuntu ubuntu-snapDomain snapshot ubuntu-snap created
我们可以看到创建了两个快照
virsh # snapshot-list ubuntu
 Name                 Creation Time             State
------------------------------------------------------------ 1495769524           2017-05-26 11:32:04 +0800 shutoff
 ubuntu-snap          2017-05-26 11:36:43 +0800 shutoff
5.5 查看当前快照
virsh # snapshot-current ubuntu<domainsnapshot>
  <name>ubuntu-snap</name>
  <state>shutoff</state>
  <parent>
    <name>1495769524</name>
  </parent>
  <creationTime>1495769803</creationTime>
  <memory snapshot='no'/>
  <disks>
    <disk name='vda' snapshot='internal'/>
    <disk name='hda' snapshot='no'/>
  </disks>
当前快照是最新快照,可以通过快照配置文件看出快照关系是继承的,ubuntu-snap的父亲就是1495769524
5.6 通过快照恢复虚拟机
5.6.1 关闭虚拟机
virsh # shutdown ubuntuDomain ubuntu is being shutdown
5.6.2 查看快照版本
virsh # snapshot-list ubuntu
 Name                 Creation Time             State
------------------------------------------------------------ 1495769524           2017-05-26 11:32:04 +0800 shutoff 1495770484           2017-05-26 11:48:04 +0800 running
 ubuntu-snap          2017-05-26 11:36:43 +0800 shutoff
5.6.3 恢复到某个版本
例如恢复到1495769524版本
virsh # snapshot-revert ubuntu 1495769524
5.6.4 确认快照恢复正常
开启虚拟机,vnc链接确认
命令行确认当前快照版本
virsh # snapshot-current ubuntu<domainsnapshot>
<name>1495769524</name>
<state>shutoff</state>
<creationTime>1495769524</creationTime>
<memory snapshot='no'/>
<disks>
<disk name='vda' snapshot='internal'/>
<disk name='hda' snapshot='no'/>
</disks>
当前快照版本跟我们恢复使用的一样,vnc也显示正常,算是恢复成功。
可以删掉恢复用的镜像验证虚拟机是否正常。
6 KVM升配降配
6.1 内存
内存降配不需要开关机,但升配的话如果需要升配的内存大于内存最大值的话需要关机再升。
virsh # dominfo ubuntuId:             109Name:           ubuntu
UUID:           407cb501-975d-44df-aee0-5b23556e84dd
OS Type:        hvm
State:          running
CPU(s):         1CPU time:       17.3s
Max memory:     524288 KiB
Used memory:    524288 KiB
Persistent:     yes
Autostart:      disable
Managed save:   no
Security model: none
Security DOI:   0
由上面显示可以看出内存现在524288已经达到最大值无法在running状态进行升级,所以关机,然后进行升级,例如升级到7G
virsh # setmaxmem ubuntu 7G
再查看,可以看出修改后的状态,max被修改大了
# virsh dominfo ubuntu|grep memory*Max memory:     7340032 KiB
Used memory:    524288 KiB
现在可以对used直接在开机的时候进行修改。
virsh # setmem ubuntu 7000000
修改后查看是否生效
# virsh dominfo ubuntu|grep memo*Max memory:     7340032 KiB
Used memory:    7000000 KiB
6.2 CPU
磁盘根cpu都需要在xml文档里面配置,然后通过virsh create命令来实现。
可以用 virsh edit命令进行对cpu 磁盘字段的编辑 也可以找到xml所在文档用vim等工具进行编辑
修改完通过create命令就可以实现虚拟机的扩容了
6.3.1 磁盘扩容
找到磁盘镜像用qemu-img resize命令进行扩容
6.3.2 增加块磁盘
# virsh edit vm1<disk type='file' device='disk'>
<driver name='qemu' type='raw' cache='none' io='threads'/>
<source file='/vm-images/vm1.img'/>
<target dev='vda' bus='virtio'/>
<address type='pci' domain='0x0000' bus='0x00' slot='0x04'function='0x0'/>
</disk>
Add:
<disk type='file' device='disk'>
<driver name='qemu' type='raw' cache='none' io='threads'/>
<source file='/vm-images/vm1-add.img'/>
<target dev='vdb' bus='virtio'/>
<address type='pci' domain='0x0000' bus='0x00' slot='0x06'function='0x0'/>
</disk>
改完配置通过virsh create 命令就可以了

- 标签:
-
网络安全